Testing a Script
With device-specific testing, admins can quickly improve scripts, track their behavior in real time, and make changes based on clear logs and outcomes. This speeds up troubleshooting and makes scripts more dependable. You can test an existing or a newly created script. Before testing a script, it should be saved.
Script testing is a crucial step and it should be performed in the following scenarios:
- To validate a script before publishing or linking it to a policy.
- To verify modifications after editing a script.
- To troubleshoot issues on a specific device.
- To confirm environmental compatibility prior to deployment.
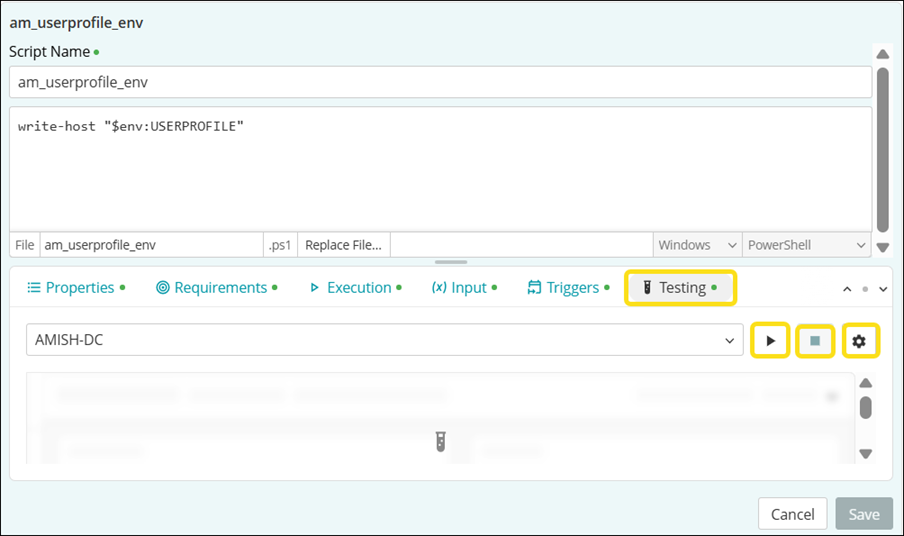
Steps to test a script
To test a script, you can select an existing script or create a new script. To test a script,
- Go to Libraries > Scripting.
- On the Scripting page, select a script you want to test.
- Click Testing to open the testing pane.
- From the device selector drop-down, select a device on which you want to test the script.
- Click the
 button to start the script job.
|
|
NOTE: If the script is unsaved, the system prompts you to save it before testing. To enable auto-save, select the check box Always save changes before testing. |

The system generates a detailed log and displays it in the test history panel, which remains separate from the general script history. It stores each test run as a record. You can click a record to expand it and view more details.
Script Testing Statuses
As the test runs, the system displays the following statuses in sequence:
- Pending
- Running
- Finished (with one of the result : Succeeded, Failed, or Timed Out)
Output and Logs
After the testing is complete, you can access the following information:
- View the result : The status and output are shown in the run history.
- Download log files : Use the history view to download logs for further analysis.
- Analyze logs : Identify errors, validate expected outcomes, and refine scripts before deploying them.